
Change booking colours, icons and labels
Match the booking interface to your store while keeping the text easy to read. Header and floating calendar-button images are separate settings.
Where to go: Settings → Booking appearance
Before you start
Have any custom icons ready as PNG, JPEG or WebP: 16–1024 pixels and up to 200 KB. Choose colours with clear text contrast.
Choose the appearance and colours
Open Booking appearance. Choose White, Dark, Auto or Custom. Adjust the selection colour and text colour. Use automatic text colour if you are unsure, and check that every label remains readable.
Set the header icon
Under Header icon, choose an icon or upload a Custom header image. Select the custom-image option to use your upload. The calendar is the default icon.
Set the floating calendar button separately
Under Floating calendar button, choose its icon or upload a Custom floating button image. This image is independent of the header image, so each can use a different design.
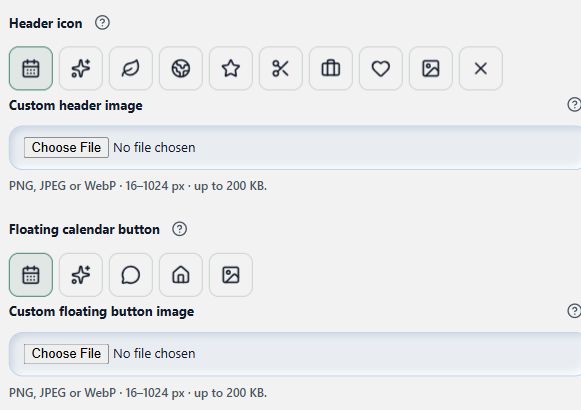
Use the upper upload for the header and the lower upload for the floating button.
View full-size imageReview labels and save
Expand Text & labels to edit the customer-facing wording. Check Customer choices if you want to adjust the choices offered. Use the live preview, choose Save appearance, then check the real storefront on desktop and mobile.
What to expect
The saved appearance is used by the booking interface. The preview is for design checks; it does not create bookings or take payment.
Common questions
Does this change email branding too?
Email branding has its own settings. Open Settings → Email branding to set the email header logo and button accent colour.
Where do I add questions customers must answer?
Open the saved service under Add a service, then its Advanced options. Booking questions belong to the service rather than the appearance settings.
Checked against the app on 5 November 2026
Screens show the Bookimatic interface with fictional sample data. Names, dates and addresses are examples.