
Connect Zoom for online appointment bookings
Each host authorizes their own Zoom account. Bookimatic creates a separate scheduled meeting for an eligible confirmed online appointment.
Where to go: Settings → Integrations → Zoom
Before you start
Add an online appointment location and assign suitable staff and services. Zoom connection availability depends on provider authorization and your Bookimatic setup.
Find the host’s Zoom connection
Open Settings → Integrations → Zoom. Choose Connect beside the staff member who will host the appointment.
Authorize the intended account
Sign in to the host’s Zoom account and review the requested permissions before authorizing. Return to Bookimatic and check that the host’s status is connected.
Select automatic Zoom meetings
Choose Use automatic Zoom meetings. Confirm that the service uses an online location and eligible assigned staff. Each booking needs a connected host.
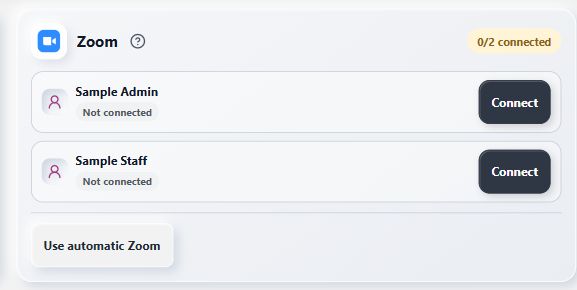
Connect the people who host appointments before enabling automatic meetings.
- Connect the host
Check the meeting lifecycle
Use a fictional confirmed online appointment to check the join link. Check a reschedule and cancellation too: Bookimatic updates the existing meeting when the appointment moves and removes it when cancelled. Use Reconnect if the host’s authorization needs renewal.
What to expect
An eligible confirmed online appointment gets its own Zoom meeting. Customers receive the join link; hosts should join through their signed-in Zoom account.
Common questions
Do all staff share one Zoom connection?
No. Each host connects their own account. Make sure the appointment’s assigned host is connected.
How do I disconnect Zoom?
Remove Bookimatic in the connected Zoom account’s App Marketplace. Contact support if you need local integration records removed as well.
Checked against the app on 5 November 2026
Screens show the Bookimatic interface with fictional sample data. Names, dates and addresses are examples.